For many of us, a “rest period” usually involves one of two things: checking our phones or rushing straight into the next set to keep the heart rate up. However, the minutes spent between your pull-ups and dips are just as vital as the reps themselves.
In the world of sports science, this is known as inter-set recovery. This is the window where your body clears out metabolic waste and replenishes the cellular energy (ATP) required for the next effort. Rest too little, and your performance drops; rest too long, and you lose the “stimulus” and time efficiency of your session.
So, how do you find the “sweet spot” for your specific goals? We’ve looked at the latest physiological research to break down the ideal recovery times for park athletes.
Resting for Muscle Growth (Hypertrophy)
If your goal is to build a more muscular physique, the traditional “gold standard” was always a strict two-minute rest. However, recent meta-analyses suggest we might have more flexibility than we thought.
Evidence indicates that 90 seconds (1.5 minutes) may be the optimal threshold for maximising gains. While resting for less than a minute can actually hinder muscle growth by preventing you from hitting enough volume in your subsequent sets, pushing past the three-minute mark doesn’t seem to offer much extra benefit for size.
The Park Gym Rule: If you’re short on time, a slightly shorter rest (around 60-90 seconds) is a great compromise. It keeps the session moving without sacrificing too much growth. A good internal cue is your performance: if you did 10 pull-ups in set one, but can only manage 4 in set two, you haven’t rested long enough. Aim for a drop-off of only 1 or 2 reps.
Ideal Rest: 1.5 – 2 minutes.
Resting for Maximum Strength and Power
When you are working on “Heavy” bodyweight moves—like Muscle-Ups, Front Levers, or Weighted Dips—your nervous system takes a much bigger hit than your muscles do.
Studies consistently show that 3 to 5 minutes of rest is superior for strength gains. This longer window allows the Central Nervous System (CNS) to fully reset, ensuring you can generate the maximal force required for those explosive or highly technical movements.
Even if you aren’t lifting heavy iron, these long rests are essential for high-skill calisthenics. Attempting a difficult skill while neurologically fatigued is a recipe for poor form and plateaus.
If you are training for high-rep challenges or using a circuit-style format to “burn off” the holiday treats, your rest periods should be significantly tighter.
Research into endurance performance suggests that short-interval recovery—ranging from 20 seconds to one minute—is the most effective way to build stamina. By keeping the rest short, you teach your body to perform under the presence of fatigue and improve your “lactate threshold.”
This is the only time where “feeling the burn” and being out of breath is actually part of the intended training stimulus.
Ideal Rest: 20 seconds – 1 minute.
Summary: Listen to Your Body
While the data gives us great benchmarks, the most important variable is individualisation. Factors like the temperature outside, your sleep quality, and the complexity of the exercise all play a role.
For Size: 1-2 minutes.
For Strength: 3-5 minutes.
For Stamina: Under 60 seconds.
Next time you’re at the bars, keep an eye on the clock. Mastering your rest is the easiest way to stop “leaving gains on the table” and start seeing real progress.
How long do you usually wait between sets? Let us know your routine in the comments below.
We are thrilled to announce that Park Gyms has recently been recommended by two of the UK’s most respected publications: The Independent and 220 Triathlon.
As we move into 2026, the “cost of living” is still a huge factor in how people train. These articles highlight that you don’t need an expensive monthly contract to get elite-level fitness results—you just need to know where to look.
What they said about us:
The Independent: In their guide on “How to save on your gym membership,” they recommended us as a key resource for athletes willing to “brave the elements” and find high-quality, free bodyweight equipment in their local area.
220 Triathlon: Named us in their “Free ways to improve your health and fitness in 2026” feature, noting our directory as an easy way to find outdoor gym parks across the UK.
Why this matters
Our mission has always been to make fitness accessible to everyone, regardless of their budget. Being recognised by these major outlets helps our resource reach more people who are looking for free workout environments.
The week between Christmas and the New Year is a strange psychological limbo. We are often caught between the guilt of recent indulgence and the overwhelming pressure of impending resolutions. For many, the desire to “work off” the festive season is fueled more by shame than by genuine motivation.
To truly get back on track, we need to stop fighting our bodies and start understanding our brains. Use these tips below to help navigate the psychological shift from holiday mode back into high gear.
1. Beware the “All-or-Nothing” Trap
The most common psychological pitfall after Christmas is Dichotomous Thinking. This is the belief that you are either “on the wagon” or “off it.” When we feel we’ve “ruined” our progress with a few days of heavy eating, the brain often decides to abandon all discipline until January 1st.
The Fix: Practice the “Volume Dial” approach. Instead of an On/Off switch, think of your healthy habits as a dial. If you can’t turn it up to 10 (an hour-long workout), don’t turn it to 0. Keep it at a 2 or 3 with a ten-minute walk. Consistency beats intensity every time.
2. Leverage the “Fresh Start Effect”
Behavioral scientists have identified a phenomenon called the Fresh Start Effect. We are naturally more motivated at “temporal landmarks”—Mondays, the first of the month, or the end of a holiday. These landmarks allow the brain to relegate past “failures” to a “previous version” of ourselves.
The Fix: Use this psychological clean slate to your advantage. Don’t wait until the New Year is halfway through January. Pick a specific date this week to be your personal “Day One,” and treat it as a hard boundary between the holiday version of you and the current version.
3. Focus on “Addition,” Not “Subtraction”
Post-holiday motivation often centers on restriction: no sugar, no carbs, less sitting. Psychologically, focusing on what we are losing creates a sense of deprivation, which inevitably leads to a “rebound” binge.
The Fix: Reframe your goals through crowding out. Instead of saying “I won’t eat chocolate,” say “I will add two liters of water and a serving of greens to my day.” By focusing on what you are adding, you naturally leave less room—and less mental energy—for the habits you’re trying to reduce.
4. Shorten the Feedback Loop
The reason we find it so easy to eat festive food is that the reward is instant (dopamine). The reason we find it hard to exercise is that the reward (weight loss or fitness) is delayed.
The Fix: Give yourself an immediate “win.” Don’t exercise to lose weight three weeks from now; exercise to feel the immediate “mood lift” or “mental clarity” that comes ten minutes after a walk. When you link the activity to an immediate psychological benefit, your brain is far more likely to want to repeat it.
Summary: Be Kind to Your “Holiday Self”
The most important psychological tool you have is self-compassion. Research consistently shows that people who forgive themselves for “slipping up” return to their healthy habits much faster than those who practice self-criticism.
You didn’t “ruin” anything; you had a season of celebration. Now, it’s simply time to transition back into your groove.
Short on time but ready to build some serious upper body strength? This efficient 20-minute workout is perfect for any outdoor space – your local park, garden, or even your living room – with just a resistance band. Get ready to activate your chest, back, and shoulders for a powerful session.
Duration: 20 minutes
Equipment: Resistance Band (and a sturdy anchor point)
Difficulty: Beginner / Intermediate
Targets: Back, Chest, Shoulders, Arms
Always begin with a 2-3 minute light warm-up (e.g., arm circles, light jogging on the spot) and finish with 2-3 minutes of gentle stretching on the muscles you’ll be working.
The Workout
Perform 3 rounds of the following exercises, aiming for the suggested repetitions. Take a short rest (60-90 seconds) between exercises if needed, and a longer rest (1-2 minutes) between rounds.
1. Resistance Band Bent Over Rows
Stand on the middle of the band with your feet shoulder-width apart. Hinge forward at the hips, keeping your back straight, and pull the band towards your chest, squeezing your shoulder blades together. Slowly return to the start.
Modification: Use a lighter band or decrease the range of motion. For more challenge, use a heavier band or move your hands closer to the middle of the band.
Reps: 12-15 repetitions.
2. Resistance Band Chest Press
Anchor the band to a sturdy object like a wall or door anchor behind you. Stand facing away from the anchor, holding the handles at chest height. Press your hands straight out in front of you, engaging your chest, then return with control.
Modification: If no anchor is available, you can perform push-ups instead. For more challenge, stand further away from the anchor point.
Reps: 12-15 repetitions.
3. Resistance Band Standing Shoulder Press
Stand on the middle of the band with your feet shoulder-width apart. Hold the handles at your shoulders with your palms facing forward. Press your hands straight overhead, then lower them slowly back to your shoulders.
Modification: Use a lighter band. For more challenge, use a heavier band or shorten the band by moving your hands down the handles.
Reps: 10-12 repetitions.
4. Resistance Band Shoulder Front Raises
Stand on the band with your feet shoulder-width apart. Hold the ends of the band and, with straight arms, raise them directly in front of you to shoulder height. Lower with control.
Modification: Use a lighter band or perform with one arm at a time. For more challenge, use a heavier band or move your hands down the band.
Reps: 10-12 repetitions.
5. Resistance Band Shoulder Lateral Raises
Stand on the band with your feet shoulder-width apart. Holding the ends, raise your straight arms out to the sides until they are parallel with the floor. Lower with control.
Modification: Use a lighter band or perform with one arm at a time. For more challenge, use a heavier band or shorten the band by moving your hands down the band.
That’s your upper body done – well done on completing the workout! Resistance bands are a brilliant way to build strength without heavy weights. We’d love to hear how you got on with this workout, so please share your experience in the comments below.
To support our free Park Gyms directory, this article contains links which may earn us a small commission at no extra cost to you.All products shown have been researched.
Finding a full gym station can be frustrating, but don’t let that derail your fitness journey! Whether you’re at your local Park Gym or simply enjoying the great outdoors, you can still get a fantastic workout without any equipment. Here’s a simple and effective routine perfect for beginners.
Start with a warm-up to get your body ready. Spend 5 to 10 minutes briskly walking or jogging in place. Once you’re warmed up, try this no-equipment workout: 3 sets of 10-15 repetitions of each exercise. First up, bodyweight squats to work those legs and glutes. Next, move on to push-ups (or knee push-ups if you’re just starting out) to strengthen your chest and arms. Follow that with plank holds for 20-30 seconds, building core strength. Finally, finish with lunges to really engage your lower body.
Remember to listen to your body. If you feel fatigued, take breaks between sets as needed. This workout not only saves time but allows you to build strength using your own body weight. Plus, you can easily do it in any park or open space! And don’t worry about doing it perfectly; the key is consistency.
So, the next time the gym is packed, don’t fret! Embrace the outdoors and get your workout done with this no-equipment routine. You’ve got this – and remember, every little bit counts in your fitness journey!
We tasted a wide range of ready to drink protein shakes to save you the work!
After a grueling workout session at your local park gym, or perhaps a challenging home workout, protein is crucial for recovery and muscle growth. But let’s be honest, sometimes whipping up a full, protein-packed meal isn’t practical when you’re on the go, juggling life, or simply don’t have the energy.
That’s where ready-to-drink protein shakes come in to their own. They’re convenient, delicious, and an efficient way to get high-quality protein into your system quickly. Perfect for that post-workout window, or even as a high-protein snack to keep you feeling full between meals. But with so many options lining the supermarket shelves and online stores, how do you choose the best one?
We’ve done the hard work for you, diving into the most popular and affordable protein shakes available in the UK in 2025. We’ve looked at protein content, ingredients, taste, and overall value to bring you our top 5 picks.
For 4 of our 5 recommended picks we’ve also included a link to a multi-buy option, which are usually better value than buying the bottles individually.
Protein Shake Comparison Table
Here’s a quick overview of our top 5 contenders to help you compare at a glance. (Note: Nutritional values are approximate and may vary slightly by flavour and batch. Prices are subject to change.)
Product
Protein (per serving)
Calories (approx.)
Sugar (approx.)
Key Highlight
UFIT High 25g Protein Shake
25g
158 kcal
11g
Balanced macros, great taste
Grenade High Protein Shake
26g
182 kcal
7g
Low sugar, dessert-like flavours
Optimum Nutrition High Protein Shake
50g
244 kcal
20g
Trusted brand, classic flavour
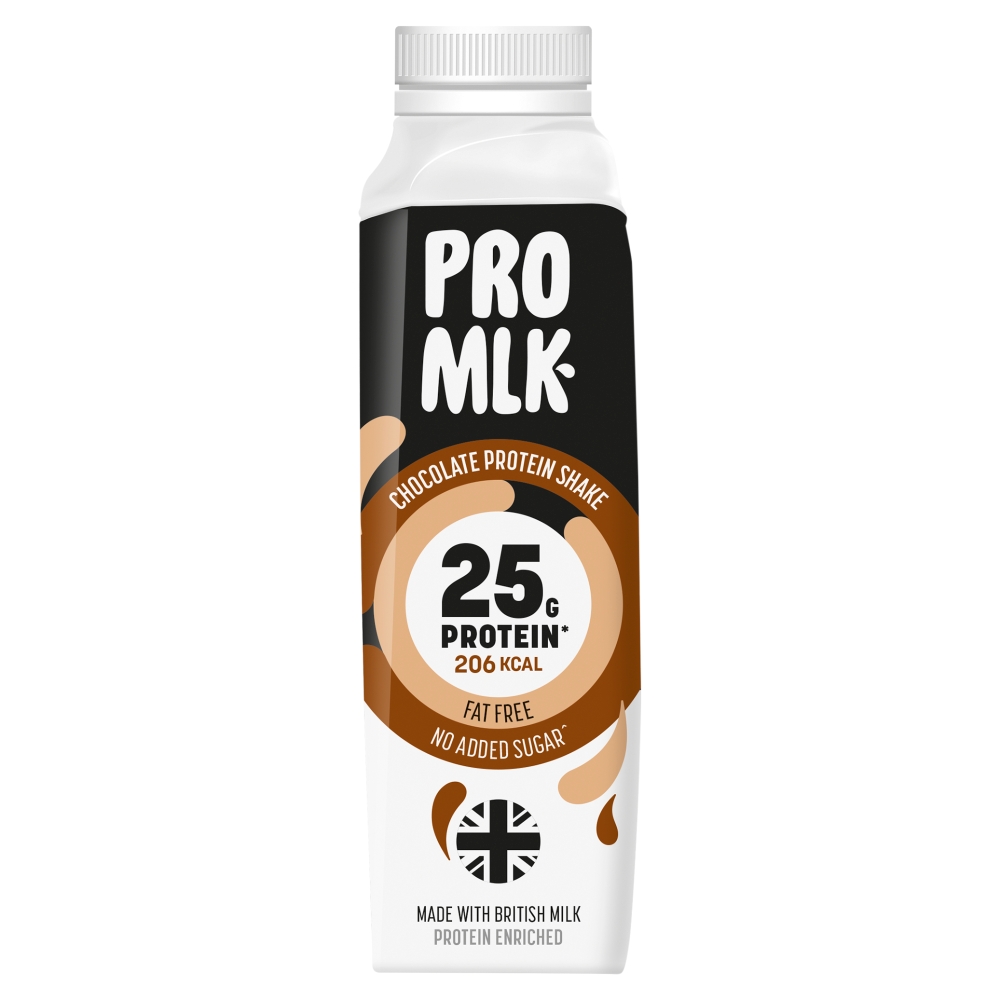
Pro Mlk Protein Shake
25g
206 kcal
20g
Smooth texture, good value
For Goodness Shakes
15g
248 kcal
43g
Recovery focus, higher carbs and sugars
Our Top 5 Best Protein Shakes for 2025
1. UFIT High 25g Protein Shake, Chocolate
UFIT has become a staple in many UK fridges, and for good reason. Their 25g protein shake offers a fantastic balance of protein, carbohydrates, and fats, making it a well-rounded option for both post-workout recovery and a satisfying snack. The chocolate flavour is consistently praised for its smooth, rich taste that avoids the artificial aftertaste some protein drinks can have. It’s not overly thick, making it easy to drink quickly when you’re on the move after a park gym session.
Pros: Excellent taste and texture (smooth, not chalky). Good balance of macros for recovery and satiety. Widely available in supermarkets and online. Reliable protein content.
Cons: Slightly higher in sugar and calories compared to some ultra-low-carb options. Price per shake can add up if bought individually.
Grenade burst onto the scene with their popular protein bars, and their shakes quickly followed suit, living up to the brand’s reputation for bold flavours and serious protein. The Fudge Brownie shake is a standout, offering a genuinely indulgent taste without the high sugar content often found in other “dessert” flavoured options. It’s a fantastic choice for those looking to keep their carb and sugar intake low while still getting a significant protein hit.
Pros: Exceptionally low in sugar. Great for those on a lower-carb diet. Delicious, dessert-like flavours that curb cravings. Good protein content per serving.
Cons: Can be slightly thicker than some other shakes, which might not suit everyone. Some find the sweetness intense due to artificial sweeteners.
Optimum Nutrition is a powerhouse name in the supplement industry, known for its high-quality protein powders. Their ready-to-drink shakes bring that same trusted quality in a convenient format. The Vanilla flavour is a classic for a reason – it’s clean, refreshing, and versatile enough to enjoy on its own or even mixed into a quick smoothie. This shake provides a solid 25g of protein, making it an excellent choice for serious recovery after a tough session at the pull-up bars or a long run.
Pros: Comes from a highly reputable and trusted brand. Clean, classic vanilla flavour that’s not overpowering. Good protein-to-calorie ratio. Reliable for consistent results. Packs a huge 50 grams of protein into a single 500ml bottle.
Cons: Can sometimes be on the pricier side compared to some other options. Flavour range might be less adventurous than some competitors.
Pro Mlk has carved out a strong reputation for offering great value without compromising on taste or protein content. Their Chocolate protein shake is a smooth, satisfying option that delivers 25g of protein in a convenient bottle. It’s often a go-to for those looking for a reliable, everyday protein boost that’s easy on the wallet, making it a perfect fit for the budget-conscious outdoor fitness enthusiast. Its consistency is often described as similar to regular chocolate milk, making it very palatable.
Pros: Excellent value for money, especially when bought in multipacks. Smooth, easy-to-drink texture. Good, classic chocolate flavour. Reliable protein content.
Cons: May not be as widely available in all local supermarkets as some larger brands. Flavour range can be more limited – with only 3 flavours (chocolate, strawberry, vanilla) currently available.
(Please note: We do not have an affiliate link for this product at this time, but it remains a strong recommendation based on its quality and value.)
5. For Goodness Shakes, Chocolate
For Goodness Shakes has been a long-standing favourite in the UK for recovery, particularly among runners and endurance athletes. While it provides 15g of protein, it also typically includes a higher carbohydrate content, making it an excellent choice for replenishing glycogen stores after longer or more intense workouts – perhaps after a full-body circuit at the park or a challenging run. The chocolate flavour is generally well-received, offering a comforting and familiar taste.
Pros: Higher carbohydrate content ideal for post-endurance recovery. Good taste and widely available. Contains added vitamins and minerals for overall well-being.
Cons: Has a much higher sugar content which might not be suitable for those on strict low-carb diets. Can be slightly more expensive per shake.
Your Buying Guide: Choosing the Best Protein Shake for YOU
With so many great options, how do you pick the perfect protein shake for your needs? Consider these factors before you buy:
1. Protein Content & Source
Most ready-to-drink shakes offer 20-30g of protein per serving, which is a great amount for muscle repair and growth. Check the source – most will be whey or casein (milk-based proteins), which are excellent for muscle synthesis. If you’re plant-based, look for shakes made from pea, soy, or a blend of plant proteins.
2. Calories & Macros (Carbs & Fats)
Your overall diet and goals play a big role here. If you’re aiming for fat loss, you might prefer a lower-calorie, lower-sugar option (like Grenade). If you’ve just completed a long, intense workout (like a long run or a big circuit at the park), a shake with a few more carbs (like For Goodness Shakes) can be beneficial for replenishing energy stores.
3. Sugar Content
While some sugar can be useful post-workout, many prefer to limit it. Check the nutrition label. Many brands use artificial sweeteners to keep sugar low, which is fine for most, but some individuals prefer to avoid them.
4. Taste & Texture
This is highly personal! What one person loves, another might dislike. Look for reviews on taste and texture. Some prefer thicker, milkier shakes, while others want something lighter. Starting with a single bottle before buying a multipack can be a good idea to find your favourite.
5. Price & Value
Ready-to-drink shakes are more expensive than protein powder, but the convenience often justifies the cost. Look for multipacks via the links in this article, as they usually offer much better value per shake.
6. Dietary Needs & Allergens
Always check for allergens like dairy or soy if you have sensitivities. Some brands offer lactose-free or plant-based options.
Final Thoughts
Ready-to-drink protein shakes are a fantastic tool for convenient protein intake. Our top 5 picks offer a range of options to suit different tastes, budgets, and dietary needs. Experiment, find what works for you, and keep fuelling your progress!
To support our website, this article contains links which may earn us a small commission at no extra cost to you. All products shown have been researched, and any links to affiliate products do not influence our reviews.
Should You Have Protein Before or After a Workout?
Protein plays a key role in any workout routine — it’s the foundation for building and repairing muscles, supporting recovery, and fuelling your body for performance. But when it comes to when you consume it, does timing actually make a difference?
Here’s what you need to know about protein timing, how it can support your training, and how to make it work for your goals.
First Things First: Daily Protein Intake Comes First
Before worrying about timing, the most important factor is hitting your daily protein intake. Whether you’re trying to build strength, support recovery, or maintain lean muscle, consistently reaching your daily target matters more than whether you have your shake before or after your session.
You can meet your protein needs through whole foods, and for many people, that’s both the most effective and affordable approach. While some choose to supplement with powders, most people can hit their protein goals affordably using whole foods alone. If you’re looking for practical tips on eating more protein without breaking the bank, check out our guide to budget-friendly protein sources.
So, Does Timing Matter?
While exact timing isn’t critical, there are still benefits to consuming protein around your workouts — especially if you’re training hard or have specific goals like muscle growth or performance.
The sweet spot? Try to eat a protein-rich meal or snack within four to six hours around your workout window. That might mean a meal beforehand and a snack after, or vice versa — whatever works best for your schedule and digestion.
Benefits of Eating Protein Before a Workout
Eating protein 30 to 45 minutes before your workout, ideally with some carbohydrates, can offer several benefits:
Fuel your muscles: Protein supports energy production and muscular endurance, especially during more intense sessions.
Reduce muscle breakdown: Training causes small muscle fibre tears — having protein available can help reduce breakdown and kick-start repair.
Support muscle adaptation: Pre-workout protein may enhance how well your muscles respond and adapt to training.
Feel fuller and more focused: A protein-rich snack can help prevent hunger pangs mid-session and keep your energy levels steady.
Good options include Greek yoghurt with oats, eggs on toast, or a light protein smoothie if you’re short on time.
Benefits of Eating Protein After a Workout
Post-workout protein helps kick-start recovery. Aim to eat within 30 to 60 minutes if possible, though research shows this window is flexible.
Benefits include:
Muscle repair and growth: Protein helps rebuild muscle fibres that are broken down during training.
Less soreness and inflammation: Protein supports recovery and may help reduce inflammation that leads to delayed-onset muscle soreness.
Replenish energy: A post-workout protein snack or meal can restore energy and support hydration.
Support lean muscle gains: Regular post-training protein helps maintain and build lean mass over time.
Quick post-workout options: eggs and wholegrain toast, a chicken wrap, or cottage cheese with fruit.
Protein for Different Workout Types
Your needs can also vary depending on the intensity of your workouts:
High-intensity training (like CrossFit, HIIT, or endurance running): Eat a mix of carbs and protein before and after training for best performance and recovery.
Lower-intensity sessions (like yoga, walking, or bodyweight workouts): You may not need a specific protein shake — just ensure your usual meals include enough protein.
Daily Protein Goals and How to Hit Them
Most people benefit from 1.1 to 1.5 grams of protein per kilogram of bodyweight per day, especially if they’re active. That’s higher than the general minimum of 0.75g/kg/day often recommended.
To make it easier:
Aim for 20–40g of protein per meal, spread over 3–5 meals/snacks per day.
Don’t forget carbs — a general ratio of 3:1 (carbs:protein) supports recovery. If you’re aiming for fat loss, a 2:1 ratio may be more appropriate.
Protein powders can be helpful for convenience, especially around workouts. Whey protein is known for muscle-building support and anti-inflammatory benefits. Plant-based options like pea, hemp, or rice protein are great for vegan diets. Still, for most people, protein needs can be met with everyday food choices.
Whether you prefer fuelling up before or after a workout, the bottom line is simple: prioritise hitting your daily protein goals consistently. Find a timing routine that suits your lifestyle, supports your training, and keeps your nutrition simple and effective.
Getting enough protein is a cornerstone of any fitness journey. It’s essential for building and repairing muscles, keeping you feeling full, and fuelling those workouts. But let’s be honest, sometimes the cost of high-protein foods can feel like another barrier to staying healthy, but it needn’t be.
The good news is, you can absolutely boost your protein intake without emptying your wallet. It’s all about making smart choices and getting a little creative in the kitchen. Here are some top tips for finding high-protein foods for less, helping you fuel your body effectively for all your workouts.
Why Protein is Your Workout’s Best Friend
Before we dive into the budget-friendly options, a quick reminder of why protein is so crucial: it’s the building block for your muscles, helps with recovery after exercise, and keeps you feeling satisfied for longer, reducing the urge to snack on less healthy options. It’s a powerhouse nutrient that supports your energy levels and overall well-being.
8 Ways to Get More Protein for Less
1. Add Beans and Lentils
Beans and lentils are incredibly versatile, packed with protein and fibre, and incredibly economical. Adding a can of chickpeas to a curry, black beans to a chilli, or red lentils to a soup is a fast and budget-friendly way to add a significant protein boost to your meals. They’re fantastic for bulking up rice dishes, stews, or even salads, making your meals more satisfying and nutritious.
2. Ground Rules
Ground (mince) chicken, turkey, and beef varieties are almost always cheaper per serving than their whole-cut equivalents. They’re perfect for batch cooking and can be used in so many dishes: lean mince for spaghetti bolognese, turkey mince for healthy burgers, or chicken mince for stir-fries. Buying larger packs when they’re on offer and freezing portions can save you even more.
3. The Greek Goddess
Unsweetened Greek yoghurt is a protein superstar. It can be bought in larger tubs for better value and is incredibly versatile. Enjoy it alone with some berries, use it as a high-protein base for overnight oats, swap it for sour cream in recipes, or even use it in savoury dips. Look for plain, natural varieties to avoid added sugars. Greek yoghurt provides a whopping 10g of protein per 100g of yoghurt, making it a great cheap source of protein.
4. Eggs: The Everyday Hero
Eggs are arguably the most affordable and complete protein source available. They’re quick to cook, incredibly versatile, and packed with essential nutrients. Whether scrambled for breakfast, boiled for a snack, or added to a stir-fry, eggs are a fantastic way to add high-quality protein to any meal of the day without a big expense. A large chicken’s egg contains around 6g of protein!
5. Embrace Canned Fish
Don’t overlook the power of canned fish like tuna, sardines, and mackerel. They’re incredibly convenient, have a long shelf life, and are packed with protein and healthy fats (especially omega-3s). Add tuna to salads or sandwiches, mash sardines on toast, or mix mackerel into pasta dishes for a quick, affordable, and nutritious protein boost.
6. Cottage Cheese Comeback
Often overlooked, cottage cheese is a fantastic, budget-friendly source of slow-digesting protein (casein), making it great for satiety. Like Greek yoghurt, it’s versatile: enjoy it plain, with fruit, mixed into scrambled eggs, or even blended into smoothies for an undetectable protein kick. Look for larger tubs for better value.
7. Raid the Frozen Aisle
Buying protein sources like chicken breasts, fish fillets, or even bags of prawns from the frozen aisle can often be significantly cheaper than fresh options. They last longer, reduce food waste, and you can simply take out what you need. This is perfect for batch cooking and ensuring you always have a protein source on hand for those busy days.
8. Look for Yellow Stickers
The reduced aisle is an excellent way of finding high quality foods such as chicken and beef, at a fraction of the normal price. Remember any food which is approaching its use by date can be put in the freezer when you get home, or cooked the same day and chilled for 2-3 days once cooked.
Fuel Your Progress, Not Your Debt!
Getting enough protein doesn’t have to be a luxury. By incorporating these budget-friendly options and smart shopping habits into your routine, you can easily meet your protein needs, support your muscle growth and recovery, and stay energised for all your outdoor fitness adventures. Experiment with these ideas, find what works for you, and enjoy the benefits of a well-fuelled body.
You’ve found your perfect park gym, you’ve got your workout plan, and you’re ready to go. But then you look at an exercise like push-ups or squats, and you see “3 sets of 10 reps.” It’s the classic advice, and for good reason – it works, especially when you’re just starting out.
But what happens when those 3 sets of 10 start feeling easy? If you’re serious about making progress – whether that’s getting stronger, building more muscle, or improving your stamina – then understanding rep ranges is your next secret weapon. It’s about tailoring your training to your specific goals, and the fantastic news is, you can absolutely do this with the free equipment at your local outdoor gym.
Why Rep Ranges Matter (Beyond Beginner Gains)
Once your body adapts to a certain challenge, it stops growing. To keep seeing results, you need to introduce something new – this is the principle of Progressive Overload. One powerful way to do this is by adjusting your rep ranges. Different rep ranges stimulate your muscles in different ways, targeting various types of muscle fibres and energy systems.
Let’s break down the three main goals and the rep ranges that best support them:
1. Building Raw Strength (1-6 Reps)
Goal: To lift or move the heaviest possible weight (or your bodyweight in its hardest variation) for a few powerful repetitions. Think mastering a full pull-up, a single-leg squat, or an explosive box jump.
The Sweet Spot: Typically 3-5 sets of 1-6 repetitions per exercise.
How to Apply at the Park Gym: Since you can’t add weight plates, you achieve this by choosing the hardest possible variation of an exercise you can still perform with good form. Examples include:
Pull-ups: If you can do 6, try to do 7. If that’s easy, focus on slower, more controlled negatives (jumping up and slowly lowering yourself for 3-5 seconds).
Push-ups: Progress to decline push-ups (feet on a bench), or try pseudo-planche push-ups (hands lower, leaning forward).
Squats: Work towards pistol squat progressions (holding onto a bar for balance, then single-leg squats).
2. Growing Muscle (Hypertrophy) (6-12 Reps)
Goal: To increase muscle size. This involves creating enough “time under tension” and metabolic stress to stimulate muscle growth. You’ll often feel a “pump” in your muscles.
The Sweet Spot: Typically 3-4 sets of 6-12 repetitions per exercise.
How to Apply at the Park Gym: Focus on controlled movements, ensuring your muscles are doing the work throughout the full range of motion. You want to feel the burn towards the end of your set.
Push-ups: Aim for 8-12 clean reps. If that’s easy, try a slightly harder variation (e.g., hands closer together, or a slightly elevated surface for incline push-ups) to stay within this rep range.
Squats/Lunges: Focus on slow, controlled descents (2-3 seconds down) and powerful ascents. Try walking lunges for 10-12 steps per leg.
Inverted Rows: Adjust your body angle on a low bar to hit 8-12 challenging reps, focusing on squeezing your shoulder blades.
3. Boosting Endurance (12+ Reps)
Goal: To improve your muscles’ ability to perform repeated contractions over an extended period. Think about long runs, continuous circuits, or simply having more stamina for daily activities.
The Sweet Spot: Typically 2-3 sets of 12-20+ repetitions per exercise.
How to Apply at the Park Gym: Focus on maintaining good form even as fatigue sets in. This is where circuit training (moving from one exercise to the next with minimal rest) shines.
Jumping Jacks/High Knees: Go for continuous movement for 45-60 seconds.
Bodyweight Squats/Lunges: Aim for higher reps (15-20+) or perform them as part of a circuit with short rests.
Plank Holds: Extend your hold time (e.g., 60 seconds or more).
Push-ups: If you can do 15 easy push-ups, try to do 20 or more, or immediately follow them with another exercise in a circuit.
Rest Times: The Unsung Hero
Just as important as the reps themselves is how long you rest between sets. This allows your muscles to recover enough to perform the next set effectively, but not so much that you lose the training stimulus.
Strength & Power: 2-5 minutes rest. You need full recovery to lift heavy or perform explosively.
Hypertrophy: 30-90 seconds rest. Enough to recover, but short enough to keep the muscle under tension and create that “pump.”
Endurance: 30 seconds or less. You want to challenge your muscle’s ability to work with minimal recovery.
At the park gym, you might not have a timer handy. Learn to listen to your body: for strength, wait until you feel truly ready for the next challenging set. For endurance, move quickly from one exercise to the next.
The Power of Mixing It Up
While it’s smart to focus on the rep range that aligns with your primary goal, don’t be afraid to incorporate other ranges into your routine. Our muscles are made up of different fibre types: some are great for strength (Type II), and others for endurance (Type I). By varying your rep ranges, you stimulate all these fibres, leading to more comprehensive growth and preventing plateaus.
For example, if your main goal is muscle growth (hypertrophy), you might spend most of your time in the 6-12 rep range. But occasionally, throwing in a heavy set of 3-5 reps (for strength) or a high-rep set of 15-20+ (for endurance) can provide a new stimulus and “shock” your muscles into further growth.
Putting It Into Practice at Your Park Gym
Now that you understand the “why” behind rep ranges, start experimenting! Look at your current workouts and think about how you can adjust the reps or exercise variations to align with your specific goals. Remember, consistency and effort are always key, but smart application of rep ranges will fast-track your results and keep your outdoor training exciting.
Ever wondered how you keep getting fitter, whether it’s mastering more push-ups, running further, or just feeling stronger in your daily life? There’s a fundamental principle at play in all effective fitness journeys, and it’s something you can absolutely apply at your local park gym: it’s called Progressive Overload.
Simply put, progressive overload means gradually increasing the demands placed on your body during exercise. Your muscles are incredibly adaptable. When you challenge them, they respond by getting stronger, building more endurance, or growing in size. But here’s the crucial part: if you keep doing the exact same thing, your body adapts to that level of challenge, and you stop seeing progress. To keep improving, you need to give your muscles a new reason to grow and adapt.
Why Progressive Overload is Your Best Friend
Without progressive overload, your fitness journey eventually plateaus. You might maintain your current level, but you won’t get stronger, faster, or build more muscle. It’s the driving force behind all physical adaptation and the reason why consistent effort leads to tangible results.
The beauty of it is that you don’t need fancy gym equipment or heavy weights to apply this principle. Your bodyweight and the simple, effective tools at a park gym are more than enough.
How to Apply Progressive Overload at the Park Gym
Since you can’t just add another weight plate to a pull-up bar, you need to get creative! Here are the most effective ways to progressively overload your workouts using park gym equipment and your own bodyweight:
1. Increase Repetitions or Sets
This is the most straightforward method. If you can comfortably do 10 push-ups, aim for 11 or 12 next time. If you’re doing 3 sets of squats, try for 4 sets. Small increases add up over time, forcing your muscles to work harder.
2. Decrease Rest Times
Reducing the break between your sets makes your workout more challenging for your cardiovascular system and muscular endurance. If you typically rest for 90 seconds between sets of dips, try cutting it down to 60 seconds. This forces your muscles to recover faster and work under more fatigue.
3. Increase Time Under Tension (Slower Tempo)
Instead of rushing through reps, slow them down. Focus on controlling both the lifting (concentric) and especially the lowering (eccentric) phases of an exercise. For example, take 3-4 seconds to lower yourself during a pull-up or a push-up. This increases the time your muscles are under strain, leading to greater growth stimulus.
4. Choose Harder Exercise Variations
This is where bodyweight training gets exciting! As an exercise becomes easy, find a more challenging version. For instance:
Push-ups: Progress from knee push-ups to regular push-ups, then to decline push-ups (feet elevated on a bench), or even pseudo-planche push-ups.
Pull-ups: Move from assisted pull-ups (using a band) to full pull-ups, then to L-sit pull-ups or weighted pull-ups (if you have a backpack).
Squats: Advance from bodyweight squats to walking lunges, then to Bulgarian split squats (one foot on a bench), or even pistol squat progressions.
Planks: Go from a standard plank to a single-arm plank, or a plank with hip dips.
5. Increase Frequency
If your body is recovering well, you might be able to train a muscle group more often. If you’re currently doing a full-body workout twice a week, consider adding a third session. This provides more opportunities for muscle stimulation and growth.
Putting It All Together
Progressive overload isn’t about making every single workout drastically harder. It’s about consistent, small increases over time. Keep a workout diary to track your reps, sets, and the variations you’re using. This allows you to see your progress and plan your next challenge.
By consciously applying progressive overload, you’ll ensure your body is always adapting, always getting stronger, and always moving closer to your fitness goals. It’s the core principle that will keep your park gym workouts effective and exciting for the long haul.